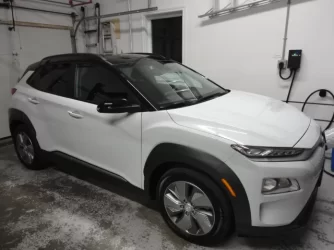
Newbie here, wife getting her 2021 Kona (preferred) six months earlier than expected.

  • Thread starter Thread starter navguy12
  • Start date Start date
  • Replies Replies 238
  • Views Views 38K
Took delivery at 1630 today.

Some nit noid stuff (cross threaded screw, so rear license plate rattles...and PPF on rear bumper will have to be redone because of greasy fingerprints under the film)...

But, my wife is happy and she loves driving it, so mission accomplished.

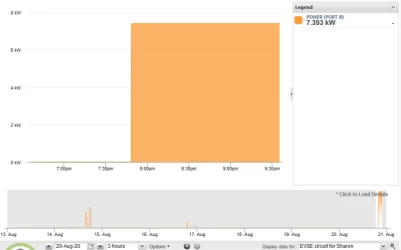
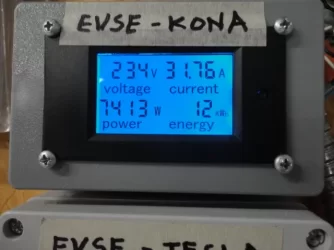
We got it with only 50% SOC, so the car is getting juiced up as we speak:

Pulling an indicated 7.4 kW (raw data):
DSC08944.webp

Eyedro system:

eyedro_20aug2020.webp

DSC08940.webp

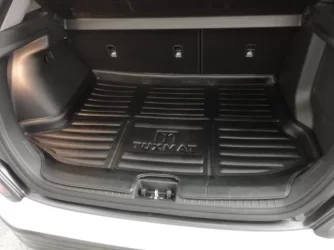
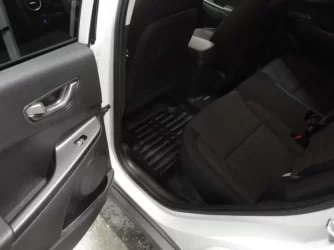
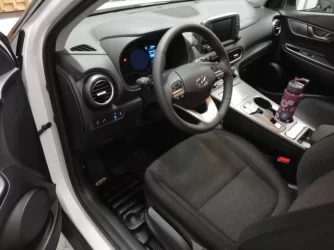
The TuxMats in place:

DSC08941.webp
DSC08942.webp
DSC08943.webp

Cheers.
 
Took delivery at 1630 today.

Some nit noid stuff (cross threaded screw, so rear license plate rattles...and PPF on rear bumper will have to be redone because of greasy fingerprints under the film)...

But, my wife is happy and she loves driving it, so mission accomplished.

We got it with only 50% SOC, so the car is getting juiced up as we speak:

Pulling an indicated 7.4 kW (raw data):

View attachment 9012

Eyedro system:

View attachment 9017

View attachment 9018

The TuxMats in place:

View attachment 9019
View attachment 9020
View attachment 9021

Cheers.
A lot accomplished in a short time, hopefully you get to share driving the car as well. When I picked up mine there were some minor flaws (small scratches, etc) which the dealer fixed no problem, even a tear in the steering wheel covering which I discovered several months later again handled by dealer without any fuss or charge to me.
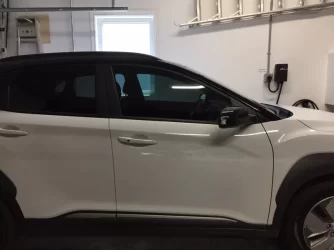
The white color blends well with the garage and an ideal placement of the EVSE so minimal trip hazard...Enjoy :)
 
Two questions:

Auto-Hold (page 5-36 of the manual): does one have to re-select "Auto-Hold" each time one starts a drive cycle, or does one select "on" once and it stays on until further notice? The manual doesn't make this clear one way or another...and it seems automatic application of the Emergency Parking Brake upon vehicle shut down requires Auto-Hold to be on (page 5-30).

The rear lift/tail gate will feel closed after a normal shut closure of it, but lift gate open warning system stays activated unless a VERY FIRM slam is applied to closing the lift gate. Is that a quirk of these cars, or is the micro-switch in need of adjustment?
 
The auto parking brake seems to engage for me with Auto Hold off as well. But yes, you have to press the auto hold button every time, I haven't found a way to set on as the default yet.

As for the left gate, it actually is probably slightly open, apparently there are some stops that you can adjust to make it easier to close, there's something about it in one of the 12Volt battery threads.
 
When our car was new, there were a few times that the rear gate did not close properly, and required a more firm slam. However, since then have not encountered that issue (unless it truly was not shut properly). So I think the stops probably wear in over time to allow a better closing.
 
Thanks for the rear gate experiences. I'll assume it just has to wear in for a few days or weeks.

Just back from getting the front windows tinted to match the factory tint on the rears:

IMG_0478.webp

Rear license plate screw and holder issue fixed.

All PPF is being peeled off and re-done by the dealership sometime within the next two weeks
 
You can tighten the rubber tail gate bumpers to pretty much eliminate the closing issue. Be careful with the auto hold. I used it at first and on my second day I reversed, the auto hold released, the car suddenly lurched and I rear-ended a car behind me. Embarrassing, maddening and dumb. I haven't used it since.
 
You can tighten the rubber tail gate bumpers to pretty much eliminate the closing issue. Be careful with the auto hold. I used it at first and on my second day I reversed, the auto hold released, the car suddenly lurched and I rear-ended a car behind me. Embarrassing, maddening and dumb. I haven't used it since.
The tail gate seems to already be less effort to properly close, but if need be I will tighten this rubber bumpers.

I got to drive the car today for the window tint job...my only frame of reference is driving my TM3 with one pedal driving to a full stop.

My wife won't use any of these features tied to an aggressive rate of regeneration, so I set it up to regen level 3 and included the option for some sort of "smart" regen. I'll see how she likes that.
 
There's really no real need to overcomplicate driving the Kona, especially while getting use to it. Almost 2 years now and I just use the fixed level 1 regen and the brake pedal to stop. I turn off the lane keeping every start so I don't get any surprises.
 
You can tighten the rubber tail gate bumpers to pretty much eliminate the closing issue. Be careful with the auto hold. I used it at first and on my second day I reversed, the auto hold released, the car suddenly lurched and I rear-ended a car behind me. Embarrassing, maddening and dumb. I haven't used it since.
I am indeed careful with it, but I haven't had an issue yet.
 
It was simply a result of newness and forgetfulness and, of course, my stupidity. I'm thinking most people will handle it better than I did.
 
One data point does not make a trend, but I think the efficiency of this car may exceed my expectations.

Yesterday morning (21 Aug 2020) the car had been topped up to 90% SOC (I'll leave the "is it safe to regularly top up to 100% and let the car sit" discussion for the proper thread).

We drove 101 kms.

We topped back up to 90% last evening.

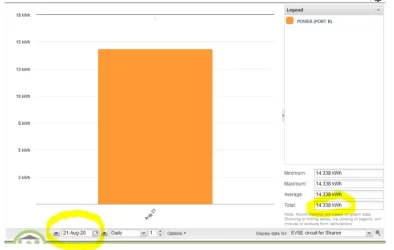
My inline meters show just over 14 kWh pushed from the grid:

01.22aug2020_single_day_snapshot.webp
Those 101 km were city and country driving up to 90 kph with temperatures around 27C.

AC system was kept "on" during several quick shopping stops.

Also, the car was "on" while the windows were being tinted.

142 Wh/km "from the grid" with all the running around yesterday.

Very impressive efficiency IMO.
 
I never get into nerd-level with the numbers, but I think your result generally matches the experience of many of us with this car. I know I regularly get the equivalent of 280-290 miles on a full charge, well over the official 258 mile range, and others have reported even better. One of the nicest surprises of owning a Kona EV.
 
I never get into nerd-level with the numbers, but I think your result generally matches the experience of many of us with this car. I know I regularly get the equivalent of 280-290 miles on a full charge, well over the official 258 mile range, and others have reported even better. One of the nicest surprises of owning a Kona EV.
Well, this is a pleasant surprise. :)

More new car nause:

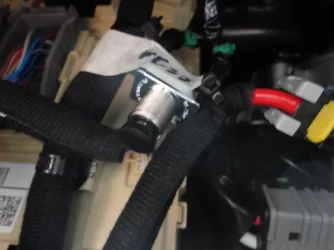
My VESS switch setup:

DSC08959.webp

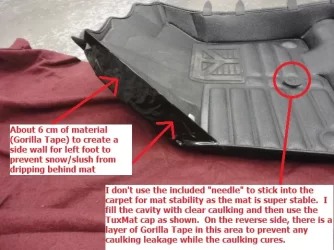
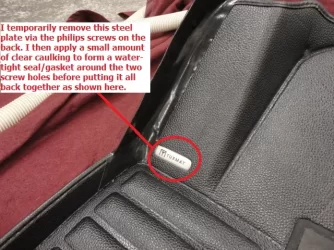
My modifications that I do to the drivers foot-well TuxMat:

DSC08962.webp

DSC08963.webp

And the NOCO GB40 showed up yesterday.

Still pending:
  • the PPF to be redone, properly this time, by the dealership,
  • Opti-Coat Pro Plus (ceramic paint protection), and
  • winter tires/wheels.
 
Exploring what exterior rear bulbs this car has (for future conversion to LED) required me to put it up on the hoist...and do a little exploring.

I plan to rust proof it later this fall and figured I may as well get comfortable with how the under chassis aerodynamic trim pieces all go together.

These parts, and the way they are fastened, are better IMO than on my TM3.

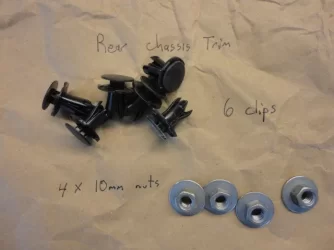
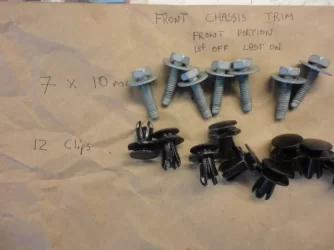
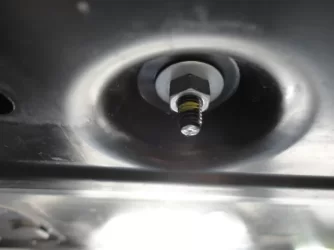
On the Kona, there is one large "robust/solid" plastic piece under the rear suspension/axle area, kept in place with these:

DSC09002.webp

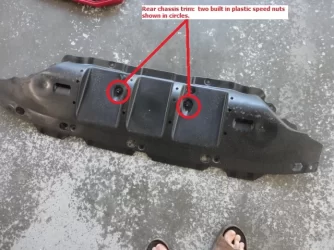
There are also two built in/attached black plastic spin nuts that allow one to quickly re-attach the trim part without any physical gymnastics (same with the front axle):

DSC08999.webp

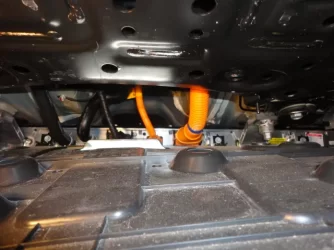
Only real surprise for me, a magnet stuck to the top portion of the high voltage battery pack as shown:

DSC08993.webp

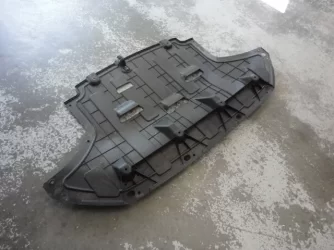
Under the front, there are two separate large plastic parts.

The very front one is removed first and put back into place last.

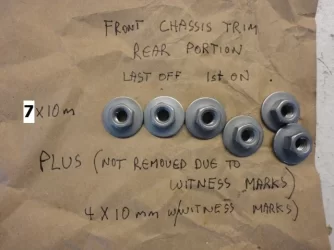
The second unit, where it attaches to the high voltage battery pack, had witness marks on the attachment point threads, so I did not completely remove it.

DSC09017.webp
DSC09018.webp
The second unit:

DSC09020.webp
DSC09021.webp

More to follow...
 
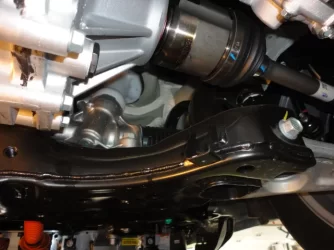
...and a few more random observations regarding the under chassis areas.

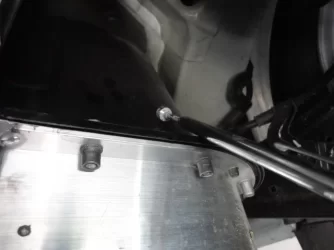
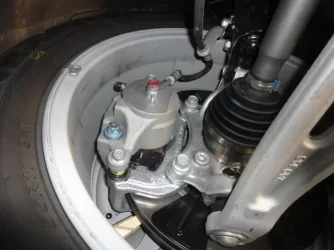
Nice to see more aluminum parts being used in the front suspension area as shown (however, the rear suspension parts all attracted a magnet):

DSC08996.webp

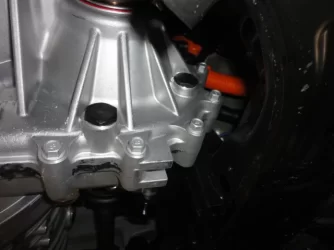
Interesting to not see any witness marks on what I take are the inspection (fill) and drain plugs for the trans-axle oil:

DSC09022.webp

The front edge of the high voltage battery pack:

DSC09023.webp

Port side output shaft (steering input shaft just below and to the right of the output shaft):

DSC09024.webp

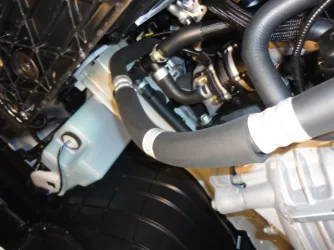
Like the TM3, miles of coolant hoses and coolant connection points:

DSC09025.webp

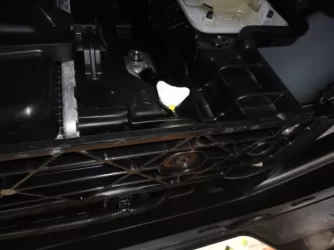
Without a formal comparison, this radiator/chiller appears to have a substantially larger surface area than my TM3.

I wonder if the use of a heat pump has any bearing on that:

DSC09026.webp

PS: my wife loves driving her car! ;)

Edit: spelling.
 
Exploring what exterior rear bulbs this car has (for future conversion to LED) required me to put it up on the hoist...and do a little exploring.

I plan to rust proof it later this fall and figured I may as well get comfortable with how the under chassis aerodynamic trim pieces all go together.

These parts, and the way they are fastened, are better IMO than on my TM3.

On the Kona, there is one large "robust/solid" plastic piece under the rear suspension/axle area, kept in place with these:

View attachment 9093

There are also two built in/attached black plastic spin nuts that allow one to quickly re-attach the trim part without any physical gymnastics (same with the front axle):

View attachment 9094

Only real surprise for me, a magnet stuck to the top portion of the high voltage battery pack as shown:

View attachment 9095

Under the front, there are two separate large plastic parts.

The very front one is removed first and put back into place last.

The second unit, where it attaches to the high voltage battery pack, had witness marks on the attachment point threads, so I did not completely remove it.

View attachment 9096
View attachment 9097
The second unit:

View attachment 9098
View attachment 9099

More to follow...
Just be sure to put a small bit of torque on those 10 mm nuts with the built on washers when re assembling, I think when mine was in for the water pumps recall they hand tightened them on and 2 of them went missing. I only discovered this when I noticed a bit of condensate leakage from the heat pump on the ground and was making sure the water was being ejected by the drainage tube noticing the rear panel (close to the battery) was near falling off! :rolleyes:
The dealer gave me a few replacements n/c and the spares now roll around in the center storage compartment.
 
Only real surprise for me, a magnet stuck to the top portion of the high voltage battery pack as shown:

The second unit, where it attaches to the high voltage battery pack, had witness marks on the attachment point threads, so I did not completely remove it.

Without a formal comparison, this radiator/chiller appears to have a substantially larger surface area than my TM3.
Many EV battery packs have a steel top cover, no doubt because that material suits the depth of the stamping required to fit the passenger compartment underside contour.
I think those yellow marks are only for factory QA. The reduction gearbox fill plug will be removed at every service to check the level.
Much of the time the radiator is used only for passively cooling the electronics and motor which might operate at around 60°C max. The lower temp differential with ambient may be why a somewhat-large cooling area is provided.
Thanks for posting the photos, always good for future reference.
 
Just be sure to put a small bit of torque on those 10 mm nuts with the built on washers when re assembling, I think when mine was in for the water pumps recall they hand tightened them on and 2 of them went missing. I only discovered this when I noticed a bit of condensate leakage from the heat pump on the ground and was making sure the water was being ejected by the drainage tube noticing the rear panel (close to the battery) was near falling off! :rolleyes:
The dealer gave me a few replacements n/c and the spares now roll around in the center storage compartment.
Cheers, I did snug them up firmly. :)
 
Back
Top