teslarati97
Well-Known Member
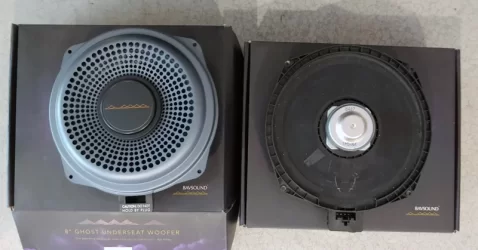
If your F56 BEV OEM subwoofer isn’t quite doing it for you, then consider upgrading to the Bavsound Ghost v3 underseat subwoofer. This is a great plug and play solution without the need for wire splicing or mounting brackets. Anyways, have some courage and go for the do-it-yourself option! The YouTube videos online are mostly accurate for the F56 but there has been a change to the F56 subwoofer cradle fitment (tighter tolerance) to make things extra annoying.
Bavsound Ghost v3 F56 BEV Underseat Subwoofer Guide (~2 hours DIY)
Annoying Scale:
Driver side speaker (6.5/10 less space to work with)
Passenger side subwoofer (4/10)
Tools required
· T50 Torx 3/8 drive bit socket* and socket wrench*
· T20 torx screw bit for screwdriver*
· Slotted screwdriver or pick* (to unclip subwoofer jumper)
· Optional gear – plastic trim remover*, extra lighting, low profile T20 torx screwdriver
*I did purchase the Bavsound universal tool kit, but only ended up using 6 of the 37 pieces.
Seat removal
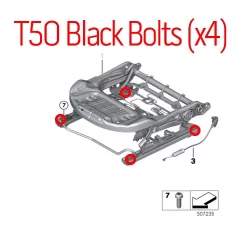
Before you begin, create the most space by pushing in the steering wheel and ratchet the seat to the highest position (to access rear bolts). Remove the two T50 front bolts by sliding the seat all the way back. Use the rear passenger handle to slide the seat and backrest forward. Remove the 2 rear T50 bolts and tilt the chair backwards into the rear passenger bench.
To speed up the seat removal (and reassembly), use the socket wrench as a breaker bar to release the tension and then disconnect the T50 bit and hand loosen. You could also disconnect the airbag seat sensor (yellow clip). However, if you do remove the sensor, you may have to clear the error codes via OBD II.
Subwoofer speaker removal
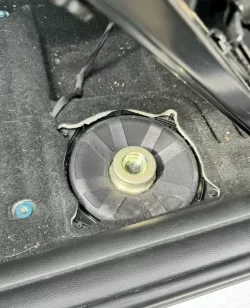
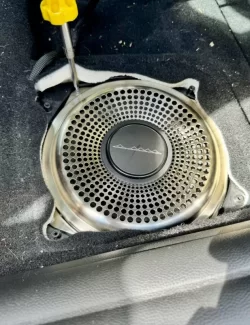
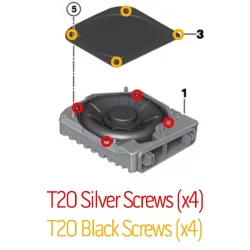
Remove black perforated cover plate by unscrewing 4 black T20 screws to reveal the speaker. To remove the woofer from the cradle, unscrew 4 silver T20 screws (Roughly 60°-150°-240°-330°). Once the screws are removed, dislodged the friction fit rubber gasket seal by gently prying the speaker along the edges with a plastic tool. Once freed, disconnect the blue speaker jumper by pressing the tab towards the speaker pins while carefully pulling up the blue jumper.
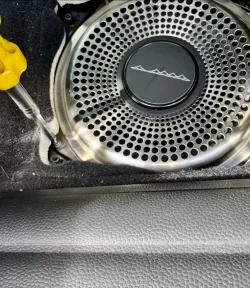
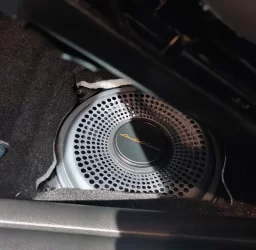
All F56 BEVs have a speaker cradle which adds extra annoyance. The most difficult screw to reach is in the 4 o’clock position (about 150°) and may require multiple viewing angles (interior looking outwards) to locate the screw covered by the foam liner. The speaker plug is around 195° or 7 o’clock position and you will have to lift the foam liner.
Ghost subwoofer installation
Line up the subwoofer and attach the blue jumper to the new subwoofer. Orientate the subwoofer to as close to the screw holes as possible (very tight tolerance for speaker cradle cutout) before tucking the subwoofer under the foam liner (speaker plug around 195° or 7 o’clock position). Use your fingers or a plastic tool to lift the foam liner. If properly aligned the subwoofer will lock into place. Give the subwoofer before mounting to the cradle (4 silver T20 screws).
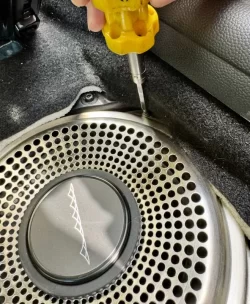
The hard part is done and you can begin reassembly! Align the cover with curved sides towards transmission tunnel (see figure below) and screw down the four black T20 screws. Reattach the seat and repeat for other side of the vehicle.
The fit into the speaker cradle is extremely snug. Fit the speaker plug side in first (around 195° or 7 o’clock) and then work your way around until you feel the speaker lock into place. The 4 o’clock T20 screw underneath the foam liner is probably the most annoying part, and a slim low profile T20 screwdriver will serve you well.
Final Thoughts
If you want to build your confidence, start with the passenger side first as there is more space to work with. Start with neutral audio from Media -> Tone and set treble and bass to 0. For break in period, give your Ghost subs 12-15 hours of playtime before making judgment! HK subwoofers are 2 ohm (+amp) and base hi-fi subwoofers are 4 ohm so the results could be different.


Last edited:
