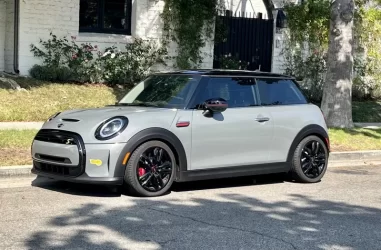
I de-badged the rather nondescript, energetic yellow blob on the hatch the first weekend I had the car. I know some folks here think that’s heresy. And that’s fine. I like the cleaner look without it, but to each their own.
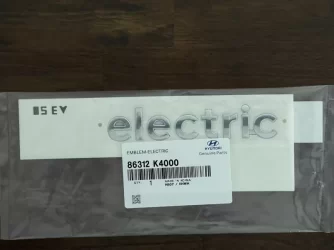
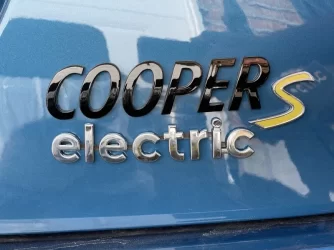
That said, every so often I do wish that I could let people know my MINI Cooper “S” is electric. I rather do like the simple, lower case “electric” found on the tailgate of every Kona, Soul, and Niro EV. I checked online, and saw that every official source for the emblem was asking between $20-$30 plus shipping. I actually found a place up here that had it for $18 Canadian, but then when I tried to order it, they wanted to charge me $20 for shipping! So I moseyed on down to my local Hyundai store, and the parts guy told me it was $25 plus tax and would take three days so I ordered it.
View attachment 18502
Then stopped by the dollar store. My idea is that I do not want this emblem to be permanent, just to slap it on once in a while. My wife has had magnetic bumper stickers on all her cars, so I figured if I pick up an adhesive magnetic sheet, I may be able to cut out a magnetic backing for the emblem. And on we go.
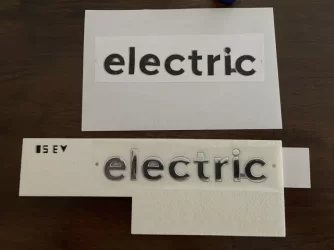
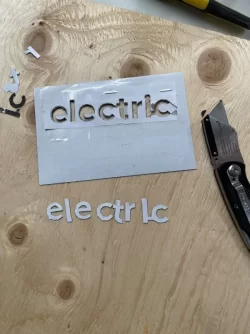
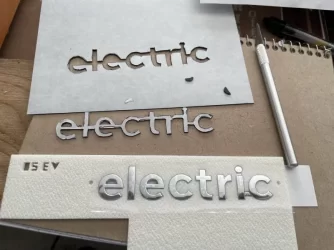
I took a photocopy of the emblem and tried to adhere it to the adhesive backing paper of the dollar store magnet sheet, then started cutting with a utility knife. It turns out that this 26 mil sheet was very thin and could easily be cut with a fine point hobby knife like an X-Acto. When I weeded out all the letters I dropped them onto the emblem, which is when I discovered one problem with my plan: the emblem ships in a die-cut piece of foam core with the backing paper on one side and transfer tape on the front… because the letters are not attached to one another! This won’t work. I paused, then took my individual magnetic letters out to the back of the car to see if they would attach strongly enough. They did not. I’m pretty sure however I affix the emblem to the back of the car with this sheet, the air back there would rip it off before I even got to the highway.
View attachment 18503 View attachment 18504
View attachment 18505
So I ordered a couple of 30 mil and 60 mil sheets from Amazon and waited for them to show up.
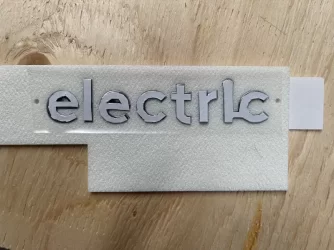
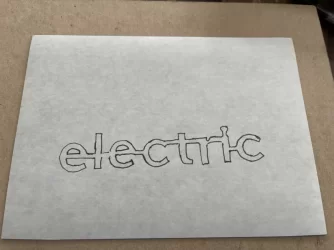
New plan: I pencil-etched the emblem onto a sheet of paper, then added connecting bars between each letter, and cut out the template. I used the negative as a stencil, and a fine-point Sharpie to trace it onto the backing paper of the 30 mil sheet. I got out an X-Acto and started cutting. It was a little more work than I had hoped — next time I will bug a friend with a Cricut machine! Once I weeded the string of letters out of the magnetic sheet, I placed it on top of the chrome lettering again, and it looked quite good. Only when I removed the backing paper to adhere the two parts together did I realize I made one small error, but it’s not very visible in the final product: the I and the C of the chrome emblem do actually have a connecting bar and I put mine in a different place. I just didn’t look closely enough (and yes, it’s RIGHT THERE).
View attachment 18506 View attachment 18507
Anyway, out to the car!
View attachment 18508
